PHXKSTM
Junior Member
 Joey
Joey
Posts: 83
|
Post by PHXKSTM on Jan 28, 2012 5:24:21 GMT -8
very awesome build. love the color combo
|
|
|
|
Post by gasser59 on Jan 31, 2012 12:44:45 GMT -8
WOW! This is really cool and I would have thought you'd have used more putty than paint but it doesn't sound like it came out that way.
|
|
|
|
Post by FMW on Jan 31, 2012 13:24:56 GMT -8
Here's the built-up chassis and interior. I thing it would make a great base for a lot of different vehicles. 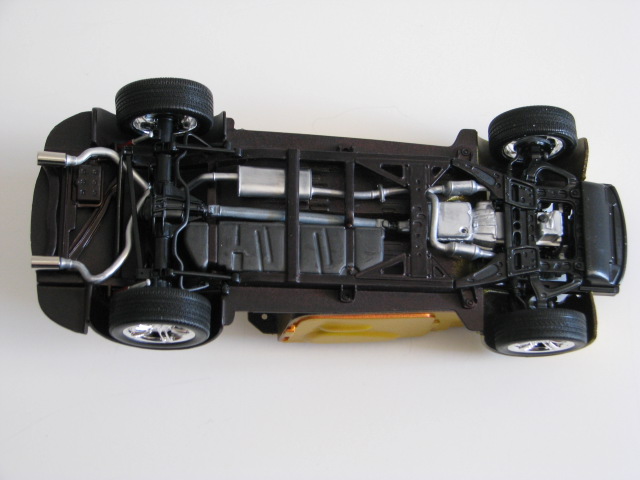 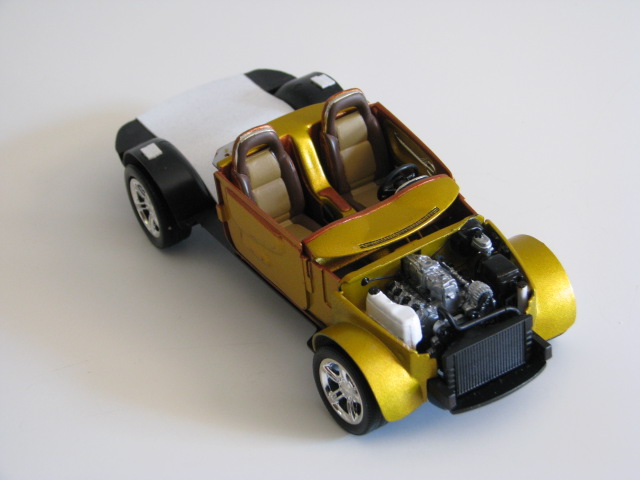 To gasser59 - I was kind of surprised how well the parts of the two kits melded together. I guess I lucked out on this one. FMW |
|
|
|
Post by FMW on Feb 4, 2012 10:37:36 GMT -8
I wanted to use some of the "Fiery Orange" (brown) color from the interior on the body for trim, but I didn't want to take a chance screwing up what I already had. Then I got an idea. Sometimes you get an idea and then say, "No, if it was that easy, someone else would have already done it." In this case, I didn't listen to myself and tried it anyway. The idea: paint Bare Metal Foil to create Peel-N-Press paint. Did it work? Well, kinda. Things we learned: 1) BMF is the one thing that 3M Blue masking tape will stick to well enough to damage when removed. Minimize the area of foil in contact with the tape (not the 1/2 inch I used to hold down the cardboard covering the rest of the foil). 2) Painted BMF is much more fragile than unpainted BMF. I couldn't pull off a strip any wider than 5 mm without ripping it to shreds. 3) Burnish with a Q-tip. Where you must use a toothpick, roll it instead of scrubbing. 4) Even with 3), some of the paint will chip. Plan on touch-up. 5) Overlaps are possible, but will be much more visible, as will burnished-down curves. It does retain one of BMF's great virtues: If you mess it up, peel it off and try again. Note that I used Testors lacquer, dried for about 8 hours. More or less drying time will obviously change the behavior of the paint layer. 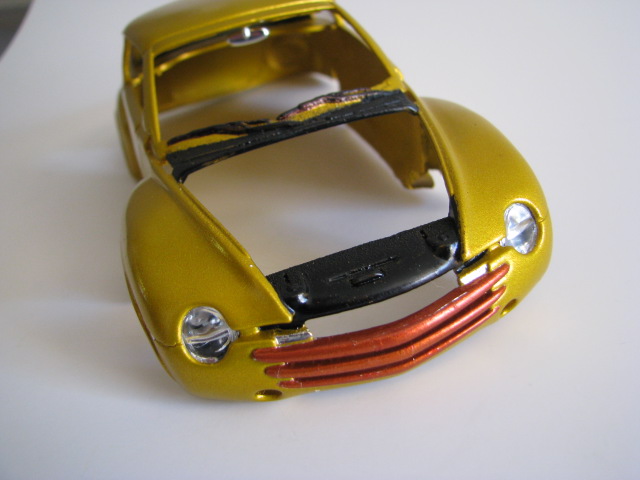  FMW |
|
|
|
Post by Danno on Feb 4, 2012 14:54:52 GMT -8
Bittchin,' Jan! 
|
|