
Post by Mastercaster on May 4, 2012 11:15:32 GMT -8
Random info in no particular order!
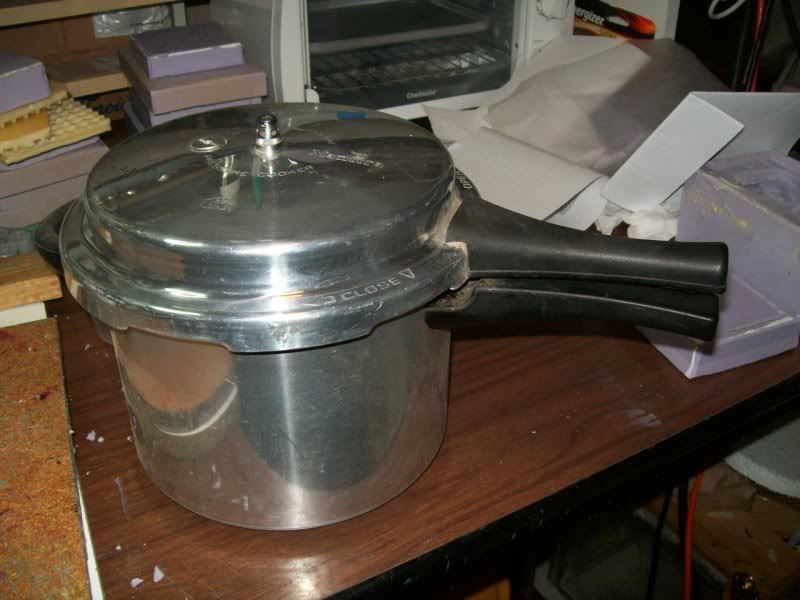
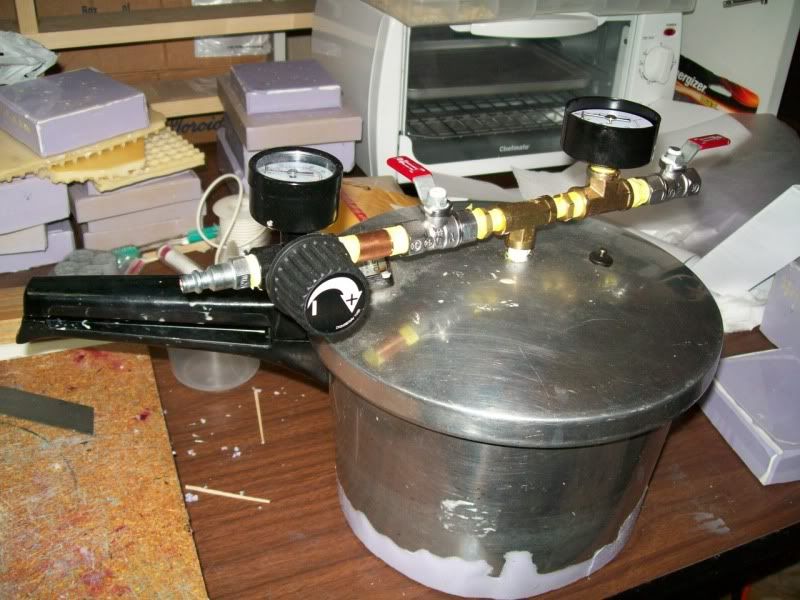
Here is a pressure cooker I picked up at the Good OL Goodwill yesterday for ten bucks. It says it is a 5.4 quart. The bottom is about 6 inches in diameter. Now, if this is the only size you have and you are making molds with the intention of having it fit you will need to do some measuring or cut out a piece of square cardboard that will fit flatly in the bottom, which is what I would do because I am lazy and not that smart. Remember that I graduated second in my class from the bottom!
OK, now if you have more than one size of these as I do you do have an advantage of most of your molds being able to fit in most of your pressure pots. Where am I going with this? HMMMMMMMMM, UMMMM I will have to get back to on this one. OH! I really should have given this subject more thought before beginning it. If you are looking at pressure pots with all those fiddly knobs that have to be flipped up and put in a groove and then all turned down to tighten to hold pressure these will be a waste of money because unless you have a really slow curing resin this is not a tool you will want. That is why I like pressure cookers. They can be converted easily but it is a added cost They will close and seal quickly.
Now let's say you are thinking of going to a Goodwill or Savers or a garage sale, ETC, etc. Like a resin kit, if you have it in your hand and you can pay for it you had better buy it! The person behind you might just be eyeing it too. If it happens to have a lid gasket, that is a plus otherwise you may need to go to a Ace hardware and hope they have one that will fit it. If it is really old and maybe of foreign descent, it might be a problem.
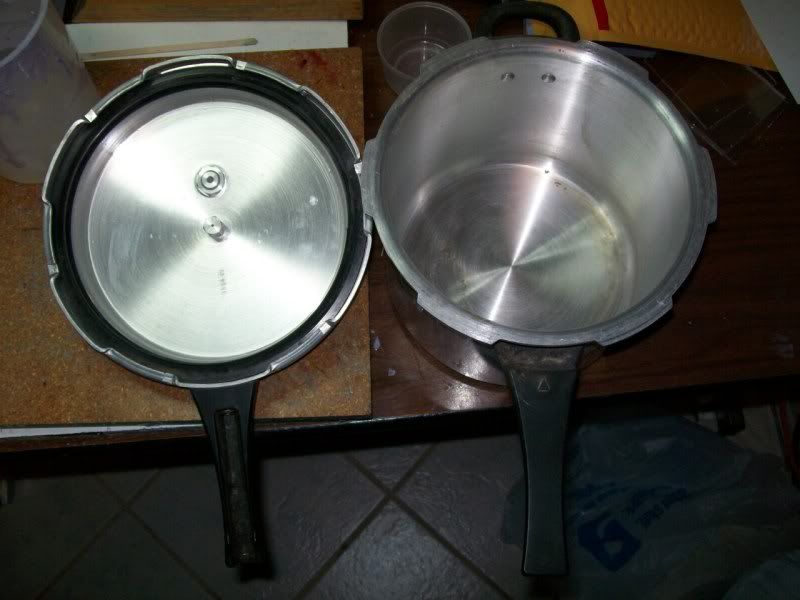
It may not close smoothly. You can take a sanding stick to some areas and get it working good. I spray them down with a good coat of my mold release. I would not spray it with WD40 or any kind of oil. Oil might get where you won't want it to get from handling or other means and cause problems. You will need it to close as quickly and smoothly as possible when you start using it.
The part in the center may unscrew out of the lid and be a 1/8th inch pipe thread. You will need to go to Ace Hardware and buy a close or next to close 1/8th pipe nipple. You will also need to buy a 1/8th by 1/4 inch bushing. If you can get a galvanized one it will be cheaper than brass. You will need to end up with 1/4 inch threads as most regulators and gauges are 1/4 inch thread. If you have the means you could drill a hole in the lid and make it all 1/4 inch thread with a 1/4 inch pipe thread tap. Typically pots are made of aluminum and easy to drill and tap.
It is important to make considerations on a air compressor size to fill the pots cavity with a proper amount of air. The compressor I built from parts will charge a small pot as I have shown about three times before the motor turns on to bring it back to the 80 PSI that the 11 gallon tank holds. If you think that an airbrush compressor will do the trick, it might but it might not. I may not fully know what I am talking about at this point but you will need a good lung or tank full of air to charge the pressure pot quickly to a good 40 or 50 PSI to have any hope of making good bubble free parts.
If the pots interior is large you could fill the interior with something thicker and solid so the mold lays flat on it so that it takes less air to fill the pot. Sort of like I have seen people put bricks in toilet tanks to take up space so it takes less water to fill the tank. Yes, it is a weird idea. I have a 23 quart pressure canner that takes a whole lot of air out of the 11 gallon air compressor tank to satisfy it. I have considered creating say two inch thick silicone sheets to stack upon one another to achieve this idea but would take more silicone than I would rather indulge in such a task. One other thing is you will make it really heavy to pick up and move around.
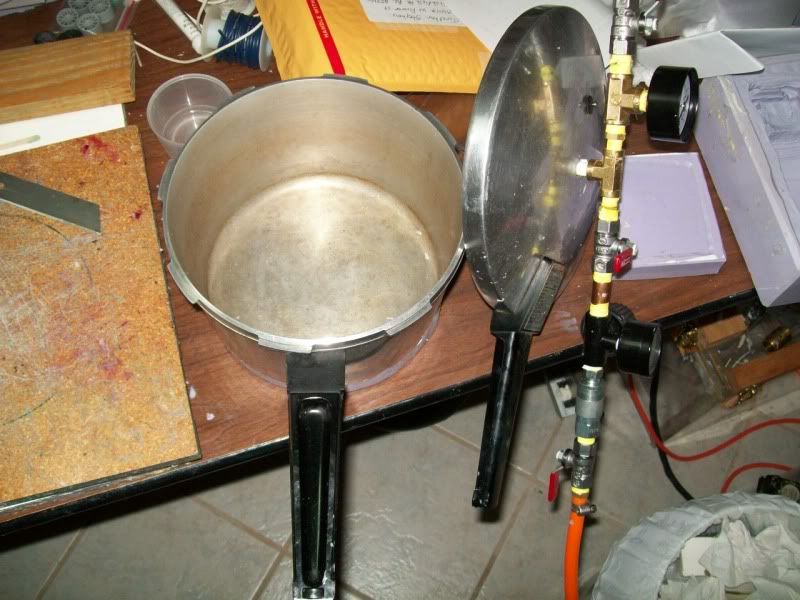
There will be one or two extra things in the lid. The only thing I do to them is put a good glob of clear GE Silicone II over them on the underside and let it cure.
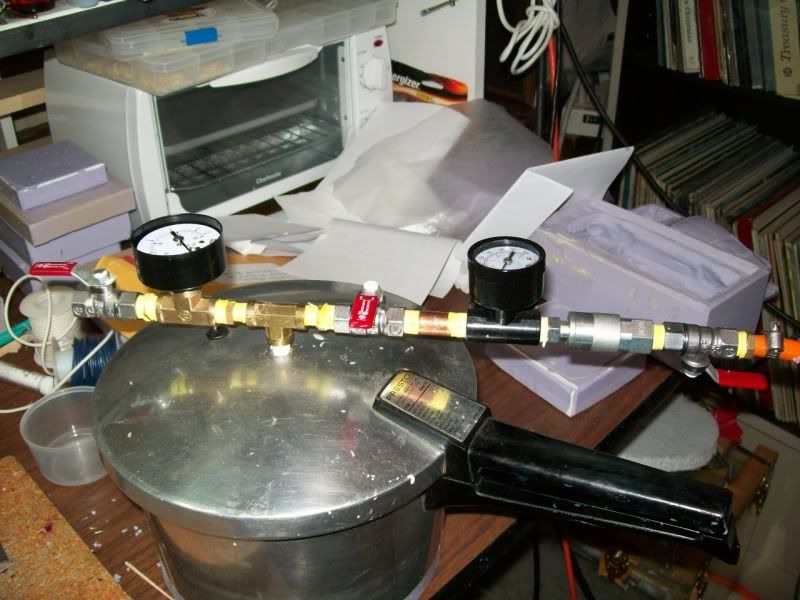
Here is one that I have converted and use. I turned them all over and wrapped tape around them and then poured silicone in to make a thick silicone pad that sticks to the bottom. I did this to help stabilize the pots as they are light.
When you have one main airline branching into three airlines they will start tipping over and moving around as you are using the pots all at one time.
On this example I used a 1/8th inch tee and used two 1/8th by 1/4 inch bushings. I buy the 1/4 ball valves from ace because they have short handles. The ones at Home Depot or Lowes are longer and take up more room. I prefer back mount gauges so they don't set up so high.
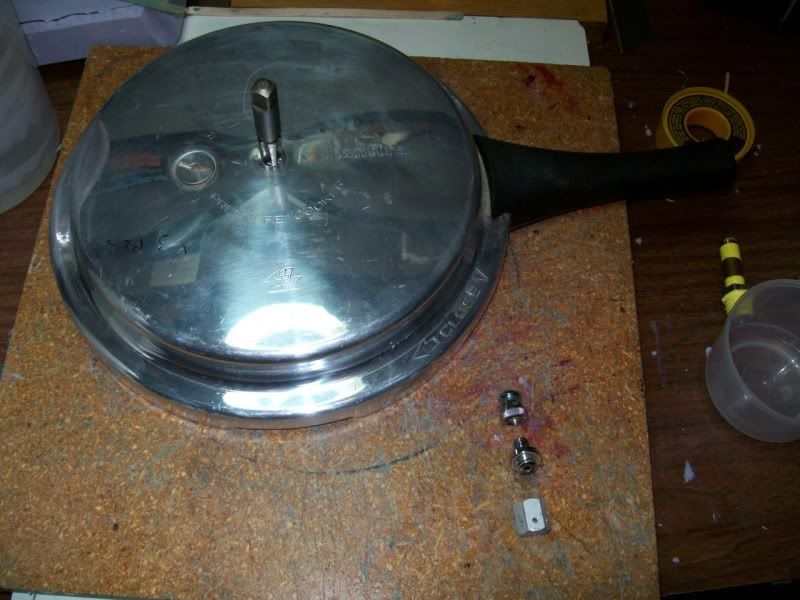
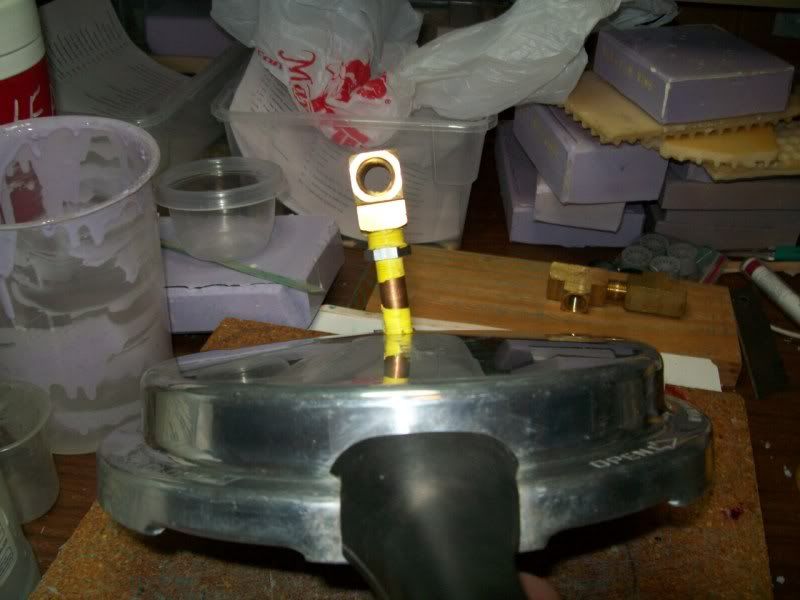
Here are the three pieces that were put together in the lid. This one is some foreign make. The tap started in the existing hole which is a plus but I did not do a very good job of tapping the hole. More attention and care should have been taken here but it will hold air just the same. Looks like I am not a master threader. I'm not a professional at putting bait on fishing hooks either......You know how that old joke goes. One thing you will want to do is to put an elbow or bent piece of tubing to deflect the air rushing in to an outer edge of the pot. If you happen to put a one piece mold in that has resin in it the blast of air will cause your resin to splash all over the inside of the pot making a big mess.
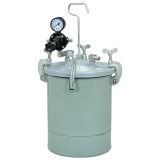
Here is a style of pressure pot Harbor Freight sells for 100 bucks but has way too many latches to mess with.


