

Post by Danno on Aug 28, 2010 10:49:38 GMT -8
Now that we’ve looked over the kit somewhat, let’s get started on the build-up!
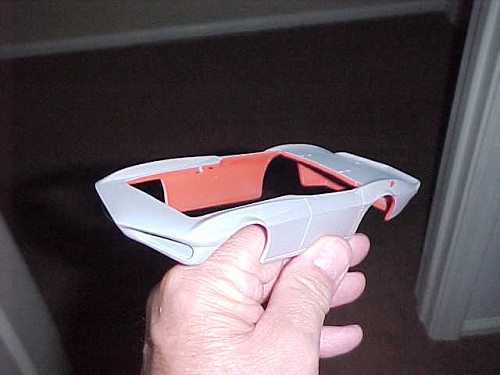
The body was dead-on, square, and virtually perfect as supplied. There was minimal effort required to prepare for painting. As with any resin product, I soaked my Cosma Ray overnight in Westley’s Bleche Wite, then washed it with Dawn and warm water. If anything, the body’s finish was so smooth and polished as delivered that I had to sand it with 4000 polishing mesh just to assure the primer could bite.

My first step was to join the front and rear pans/clips to the body, then apply catalyzed filler to the seams. Because the seams are at the sharp body lines, this is an important step; there’s no other way to conceal the joint.
The trickiest spots are where the joints intersect with the wheel openings. Careful work in these areas will produce a smooth lip with no evidence of the joint between the body and the pans. Once the filler was worked to perfection and spot-primed, it was time to paint the interior of the body.
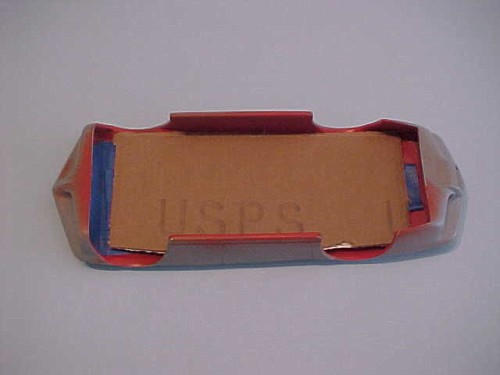
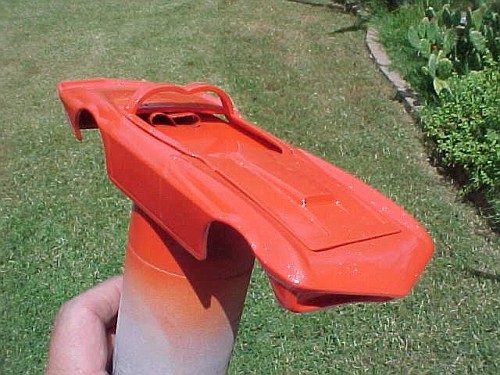
I shot it with Tamiya TS-31 “Bright Orange” which is a dead-ringer for Chevy’s Hugger Orange. After the interior hardened, I cut a piece of flat cardboard to fit the body’s interior. Attached with masking tape, I then attached the cardboard platform to a high-technology paint stand (an empty spray can) for handling.
Priming, re-sanding, re-priming, and re-sanding again produces a smooth canvass for the final paint finishing. I paint as much of the body together as possible, while paying attention to the panel edges, etc.

After a couple of coats of TS-31, I was happy with the appearance of the body. I had painted the bubble top hoop separately, but now it was time to tape it to the body for the next step; pearl clear coat.
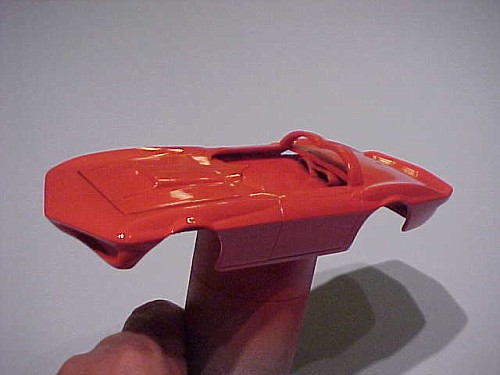
I next built up three coats of Tamiya TS-65 Pearl Clear. Wow! That made the otherwise plain, solid orange color really pop! It was noted that the images made the finish seem rough or “pebbly” but in fact it is quite smooth; the apparent texture is actually just irregular light refractions from the embedded mica chips in the pearl clearcoat. I’ll take some images out of the sun in order to convey the complexion of the finish. Like the 1:1, this finish is deceptive – in some light it appears to be just plain Hugger Orange but in other light the gold tone pearlescent overtone becomes apparent.
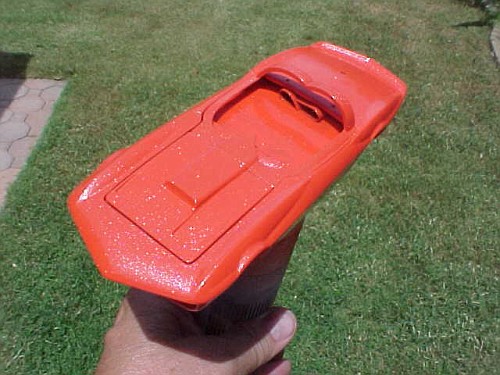
Next, a couple of wet coats of Testors 1834M Wet Look Clear and this baby is looking show-car fine! I’ll be flipping a coin for days to decide whether to polish or leave her like she is.
By the way, I get nothing from the marketing of the Cosma Ray resin kits. The Master Caster, Greg Wann, is a friend of mine who was receptive to my suggestion that he master and cast the Cosma Ray. He did a terrific job and I can highly recommend his products! My only interest in it all is in seeing that anyone else who has desires a Cosma Ray, as I did, has access to their own kit and at a reasonable cost.
The body was dead-on, square, and virtually perfect as supplied. There was minimal effort required to prepare for painting. As with any resin product, I soaked my Cosma Ray overnight in Westley’s Bleche Wite, then washed it with Dawn and warm water. If anything, the body’s finish was so smooth and polished as delivered that I had to sand it with 4000 polishing mesh just to assure the primer could bite.
My first step was to join the front and rear pans/clips to the body, then apply catalyzed filler to the seams. Because the seams are at the sharp body lines, this is an important step; there’s no other way to conceal the joint.
The trickiest spots are where the joints intersect with the wheel openings. Careful work in these areas will produce a smooth lip with no evidence of the joint between the body and the pans. Once the filler was worked to perfection and spot-primed, it was time to paint the interior of the body.
I shot it with Tamiya TS-31 “Bright Orange” which is a dead-ringer for Chevy’s Hugger Orange. After the interior hardened, I cut a piece of flat cardboard to fit the body’s interior. Attached with masking tape, I then attached the cardboard platform to a high-technology paint stand (an empty spray can) for handling.
Priming, re-sanding, re-priming, and re-sanding again produces a smooth canvass for the final paint finishing. I paint as much of the body together as possible, while paying attention to the panel edges, etc.
After a couple of coats of TS-31, I was happy with the appearance of the body. I had painted the bubble top hoop separately, but now it was time to tape it to the body for the next step; pearl clear coat.
I next built up three coats of Tamiya TS-65 Pearl Clear. Wow! That made the otherwise plain, solid orange color really pop! It was noted that the images made the finish seem rough or “pebbly” but in fact it is quite smooth; the apparent texture is actually just irregular light refractions from the embedded mica chips in the pearl clearcoat. I’ll take some images out of the sun in order to convey the complexion of the finish. Like the 1:1, this finish is deceptive – in some light it appears to be just plain Hugger Orange but in other light the gold tone pearlescent overtone becomes apparent.
Next, a couple of wet coats of Testors 1834M Wet Look Clear and this baby is looking show-car fine! I’ll be flipping a coin for days to decide whether to polish or leave her like she is.
By the way, I get nothing from the marketing of the Cosma Ray resin kits. The Master Caster, Greg Wann, is a friend of mine who was receptive to my suggestion that he master and cast the Cosma Ray. He did a terrific job and I can highly recommend his products! My only interest in it all is in seeing that anyone else who has desires a Cosma Ray, as I did, has access to their own kit and at a reasonable cost.