|
|
Post by Danno on Oct 15, 2011 10:10:39 GMT -8
Nice!
Good job, Greg!!
|
|
|
|
Post by Mastercaster on Oct 16, 2011 14:50:55 GMT -8
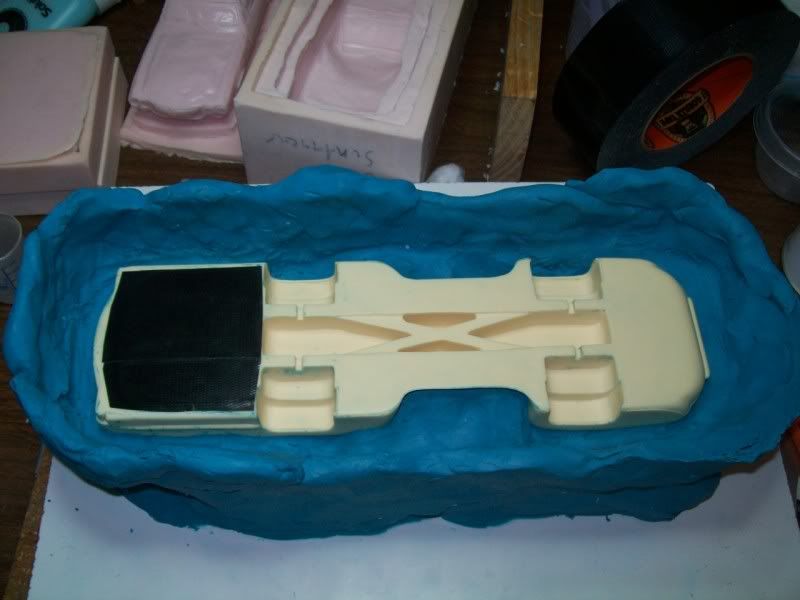 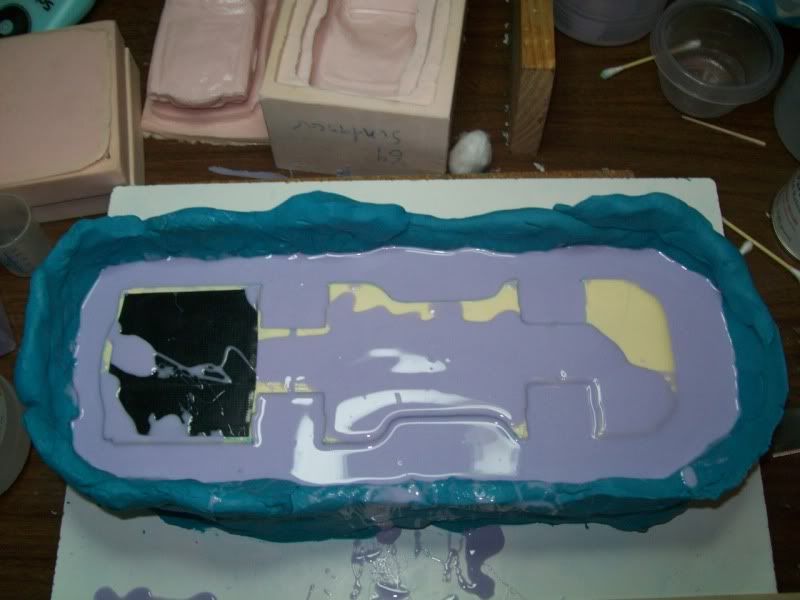 Thanks Dan. Yesterday at the build session I spent most of it building up clay around the body to make a mold of the chassis . And here it is with 330 grams of silicone around it. |
|
|
|
Post by davewilly on Oct 18, 2011 6:44:36 GMT -8
Looks cool Greg! I like following along as you do these molds and all its really cool and want to thank you for sharing with us...I dont think there is to many casters that would show this much of what they do and or go through..
So thanks!
|
|
|
|
Post by Mastercaster on Oct 18, 2011 7:16:40 GMT -8
You are all welcome. This is by far the hardest thing I have tried to do and now I am going to have to try to make a mold of the cab section. This is just getting too deep for me. I could have just copied it the way it was but thought it could be opened up underneath for expanded detail.
|
|
|
|
Post by Mastercaster on Oct 19, 2011 11:01:02 GMT -8
|
|
|
|
Post by davewilly on Oct 20, 2011 7:17:07 GMT -8
Its looking pretty cool so far Greg I am sure PLAN B will be work out just fine for you...your good at getting it figured out....to look great..not just good. most others would just make up whatever worked for them and move on. But you always seem to put in the time to make it work out right and with a quailty part.
Keep us posted!
|
|
|
|
Post by Danno on Oct 20, 2011 14:07:32 GMT -8
Oh, I'm gonna have to have one of these, too!! 
|
|
|
|
Post by Mastercaster on Oct 21, 2011 10:47:44 GMT -8
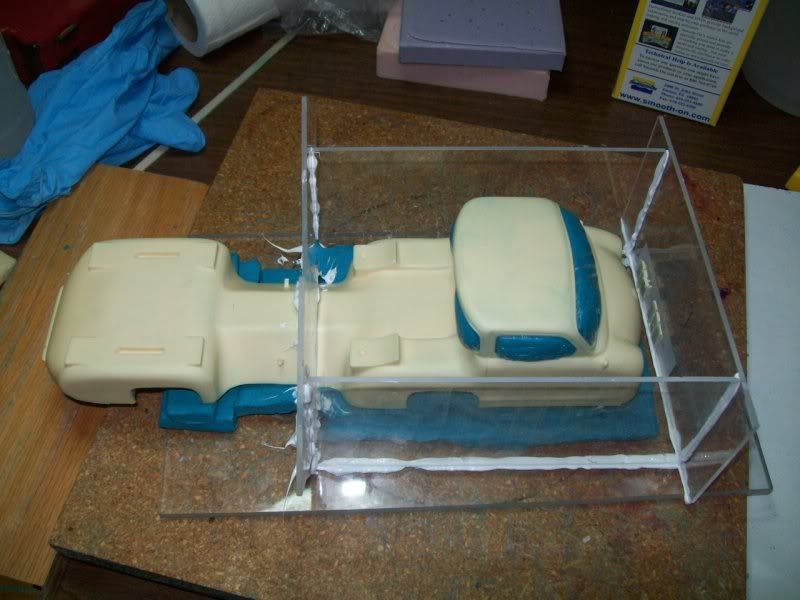 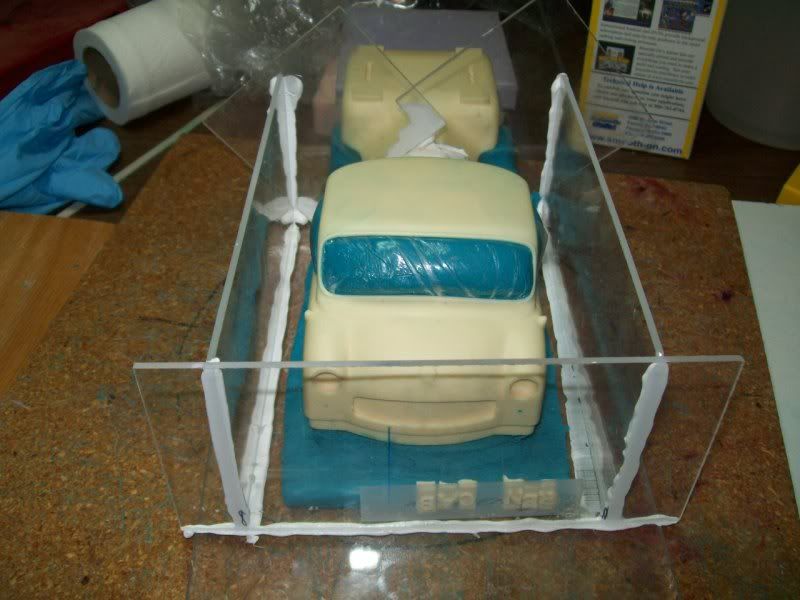 I have it sectioned off and will pour in silicone. I'm hoping it will fill in the wheel wells. I put a piece of food storage bag in to help pull the filler out. I also bulged out the window openings too. Sure hope this works. I have never tried it like this before. |
|
|
|
Post by Mastercaster on Oct 21, 2011 11:06:58 GMT -8
|
|
|
|
Post by FMW on Oct 21, 2011 11:52:28 GMT -8
|
|
|
|
Post by Mastercaster on Oct 21, 2011 12:16:28 GMT -8
That looks like a 300SLR car. But what do I know. You think the diecast needs to set more forward on the transporter? The rear fenders on the car in the article set pretty high compared to the top of the cab. Maybe the diecast doesn't look too bad after all setting on the resin transporter, I honestly just can't tell what looks good! If they were no where near one another I would not know or notice.
|
|
|
|
Post by FMW on Oct 21, 2011 17:47:53 GMT -8
There's definitely less rear fender on the race car in the picture than on your diecast. I think that what you've got looks great. The only thing I wanted to point out was that it looks like there is more length in the fender behind the rear wheel on the transport in the photo than appears to be on your resin casting. (Maybe more like 1/4 a wheel width than the 1/2 I originally estimated.) Did Mercedes only build one transport or were there several, possibly with different length rear decks? Time for me to poke at the internet some more.
FMW
|
|
|
|
Post by FMW on Oct 21, 2011 17:59:41 GMT -8
|
|
|
|
Post by Mastercaster on Oct 21, 2011 18:31:31 GMT -8
WOW!! Those are some really cool pics you found. I see what you are talking about now. That's partly why the car looks funny. Perhaps before some final mold is made this can be changed. What I understand is there was only one and it was dstroyed. There was little info in the Mercedes archives of this transporter. The one in the museum was built mostly from pictures with little change from the original. Read the article I first posted. That is where I got my info. Thanks for posting these links.
|
|
|
|
Post by FMW on Oct 21, 2011 20:12:17 GMT -8
Looking at the body you have cast, it looks like there's a featureless section between the rear wheels and the rear end that you could copy and graft into the same area on the full body to achieve the right proportions. I don't know if your mold materials would then allow you to just redo that back part of the mold. I'd hate to see you dump the work you've put into it for another 1/4" of length.
FMW
|
|
