|
|
XP-616
Jul 15, 2016 11:13:46 GMT -8
Post by FMW on Jul 15, 2016 11:13:46 GMT -8
I've finally produced some parts from my 3D printer for a 1/25 scale project. I used the 1958 GM XP-700 Corvette concept car as a base design. Since I'm not going for a full replication, I downgraded the number so it's "almost XP-700". Here are the parts: 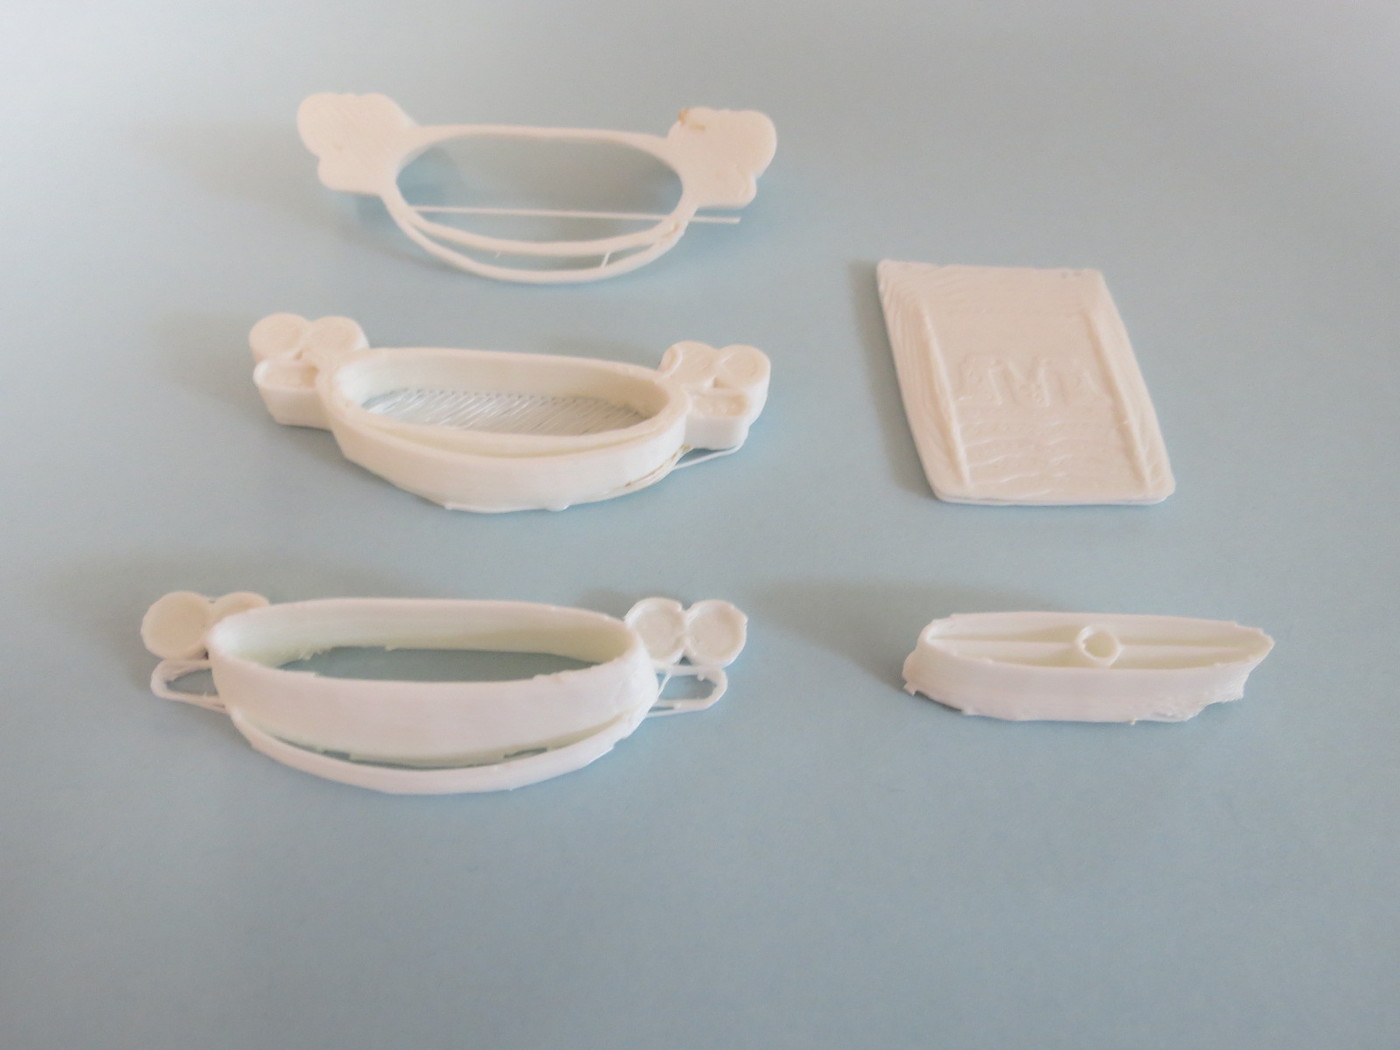 And next to an AMT '61 Corvette body: 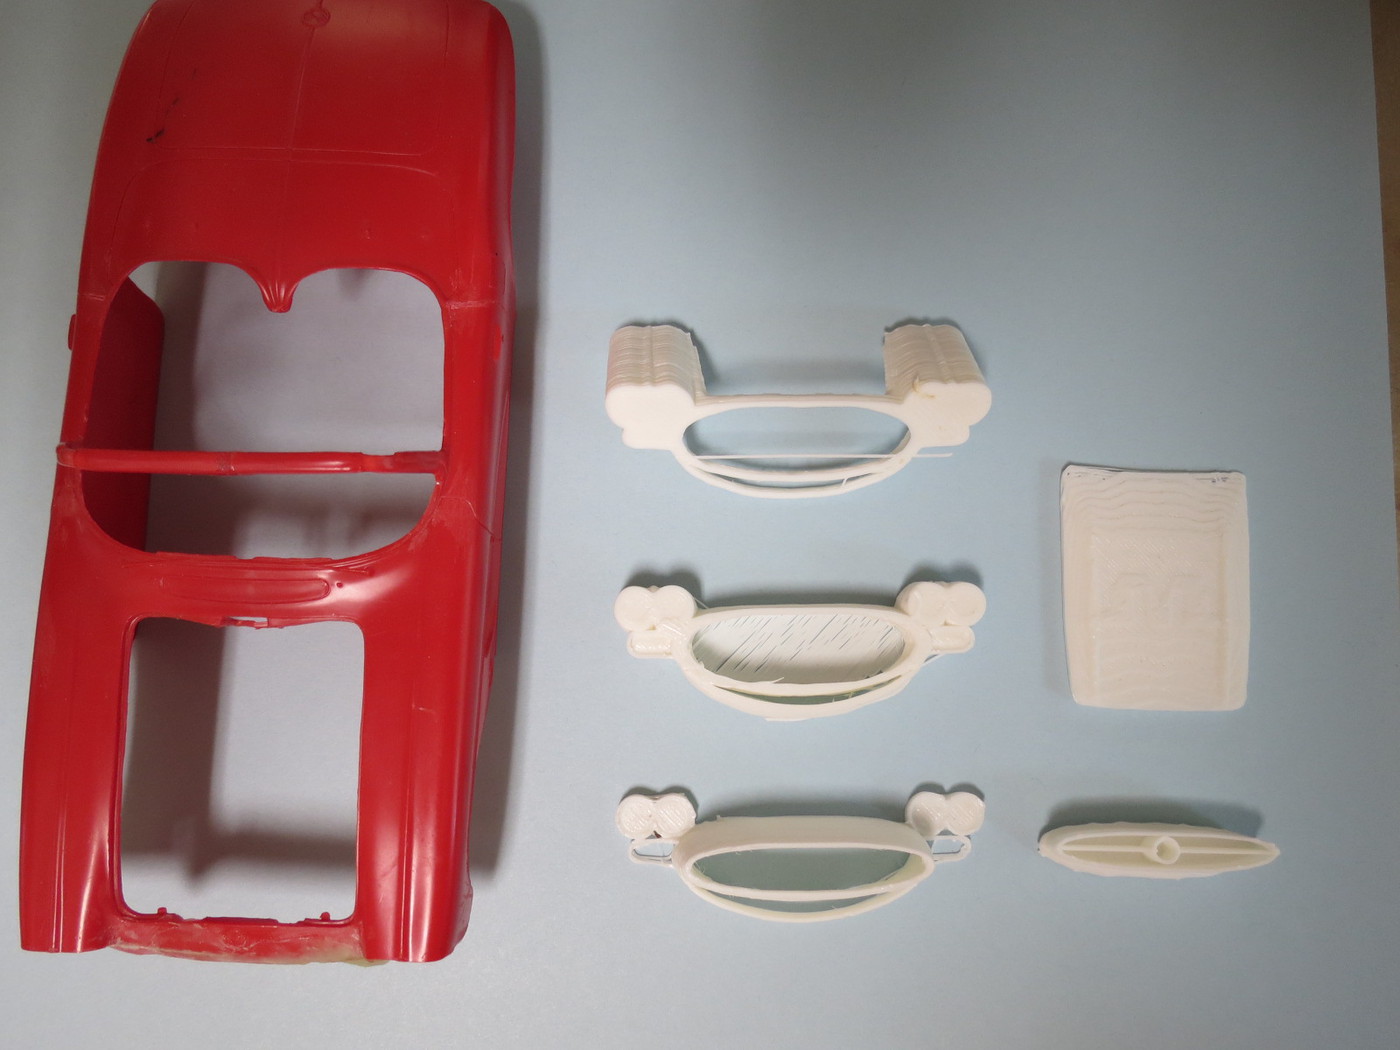 And as a tape-up: 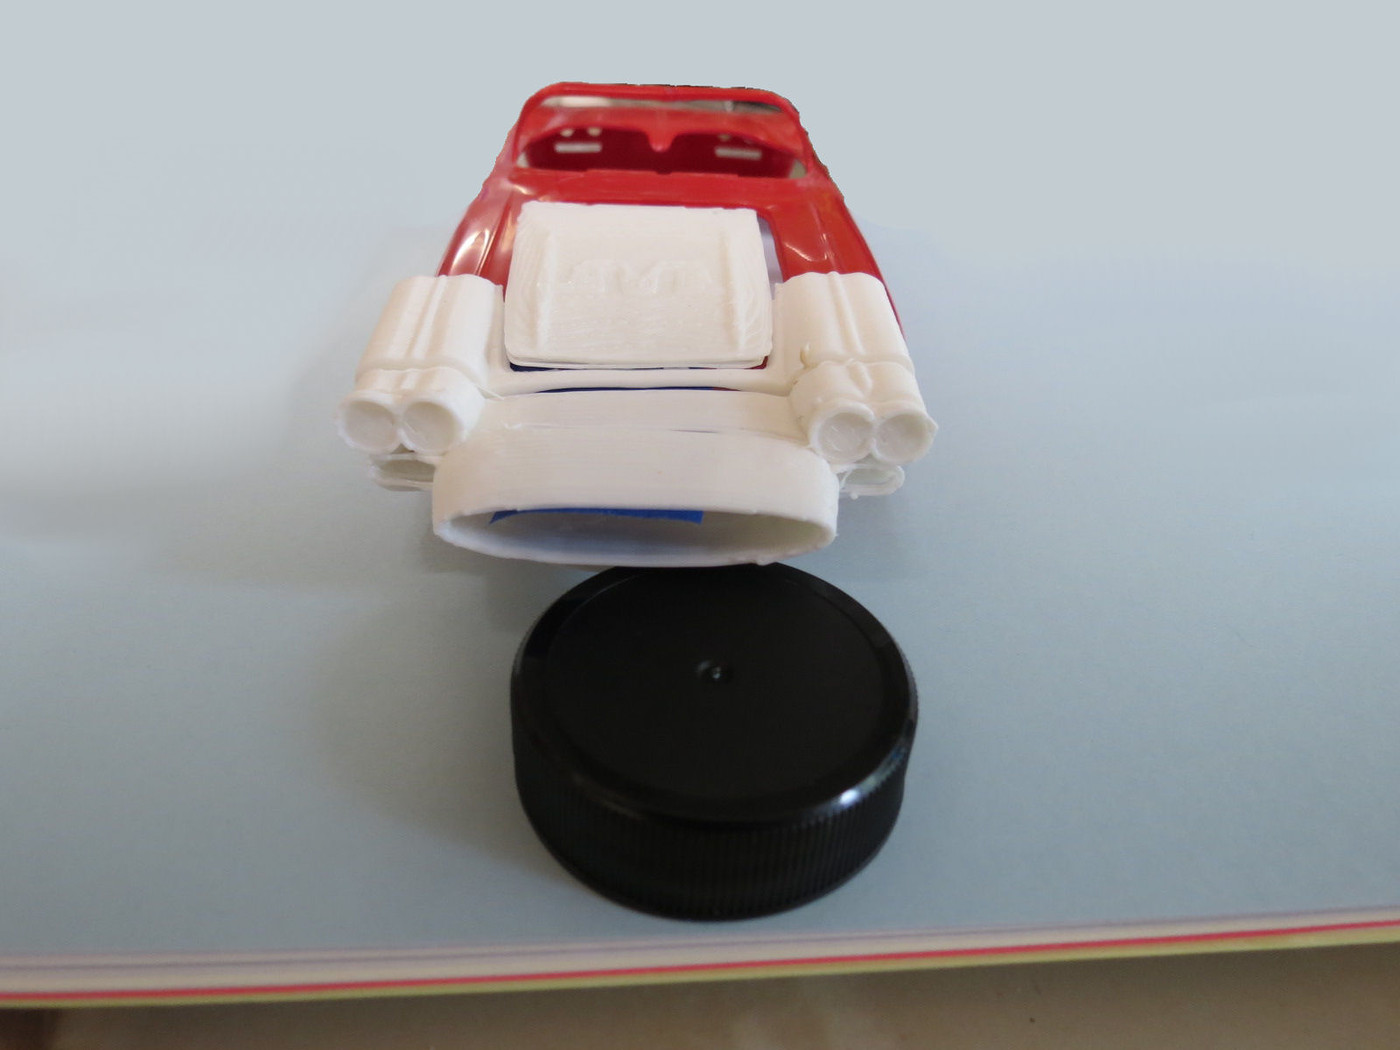 As I have said before, home 3D printing is not a mature practice. I was just getting parts to print at the right size (having printed parts about 10% too large - I'm still working on scaling) when my printer decided to let the parts pop loose from the bed when they were about half done. After two hours of experimentation (breathing styrene fumes off the ABS for about two hours, which is neither healthy nor pleasant) I finally solved the problem. At that point, I had already split the front part into two shorter sections to try to get a good print. Since the parts will work that way, I'm not going to print a one-piece nose. As you can see, the parts will require surface smoothing, but since they have to be puttied onto the body, I don't see that as much extra work. I'm not sure if I'm going to do the rear end modification for the car (maybe) or the side detail mods (not likely). Stay tuned for more results. (But don't hold your breath - I'm notoriously slow.) FMW |
|
|
|
XP-616
Jul 19, 2016 13:13:26 GMT -8
Post by FMW on Jul 19, 2016 13:13:26 GMT -8
I decided to generate parts for the rear end. Here are the raw printed parts:  As you may be able to see from this incredibly blurry picture (white objects, close position, and autofocus don't play well) the edge on the left side of the pucture has shrunk and lifted. As I said before, 3D printing is not yet plug-and-play. The fault should be easily corrected with putty during assembly.  More pictures as things develop. FMW |
|
|
|
XP-616
Jul 22, 2016 16:44:03 GMT -8
Post by FMW on Jul 22, 2016 16:44:03 GMT -8
Here are the parts glued onto an AMT '61 corvette body. 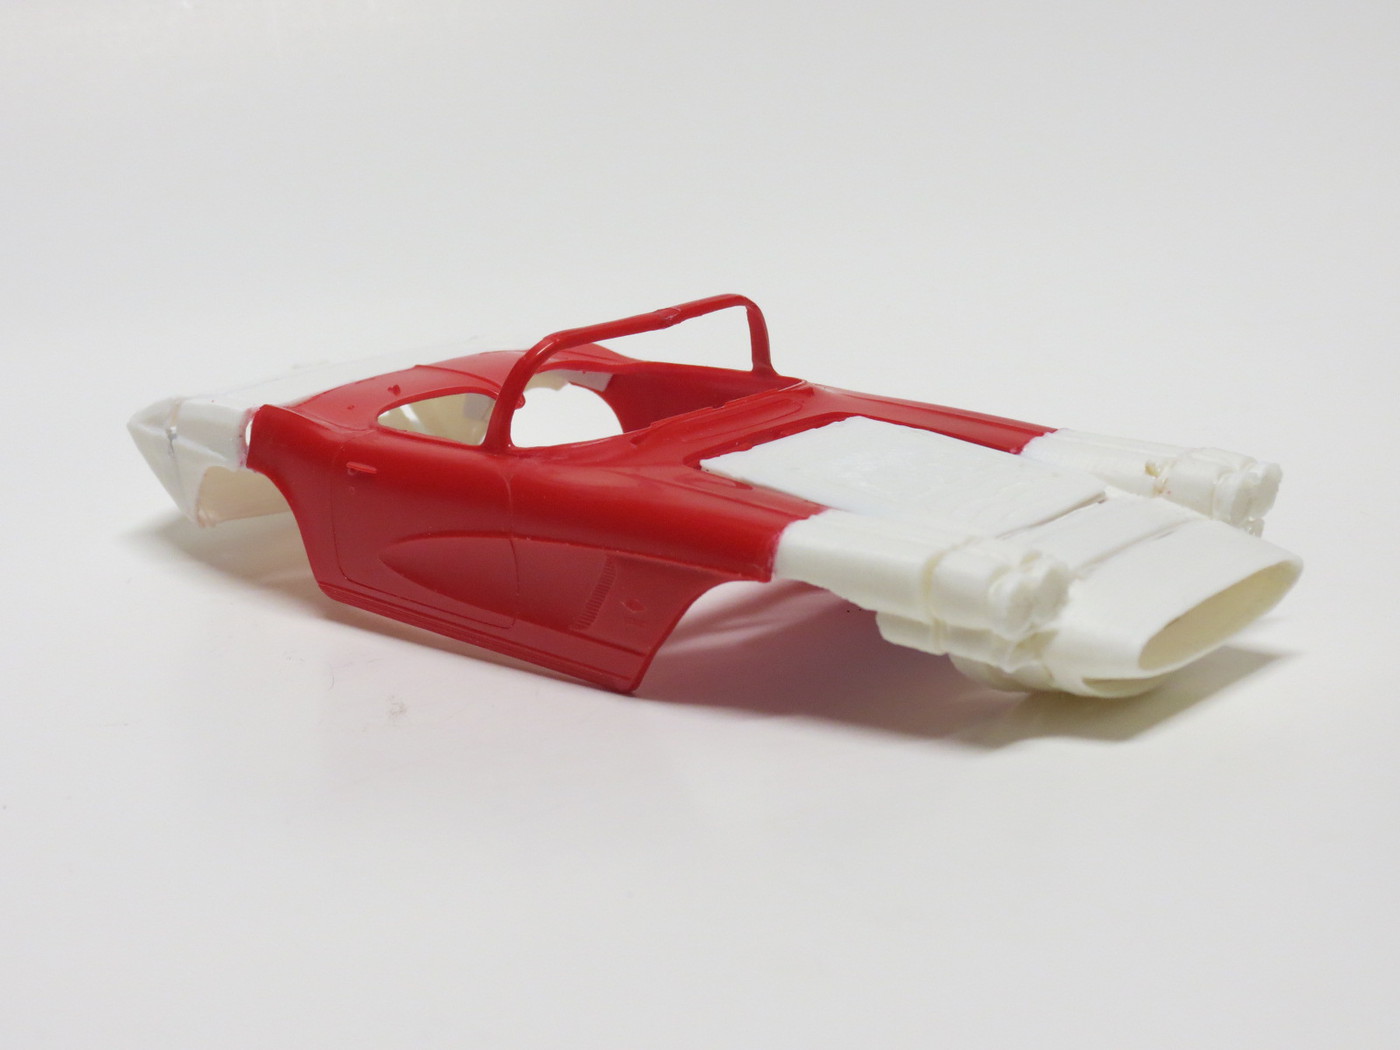 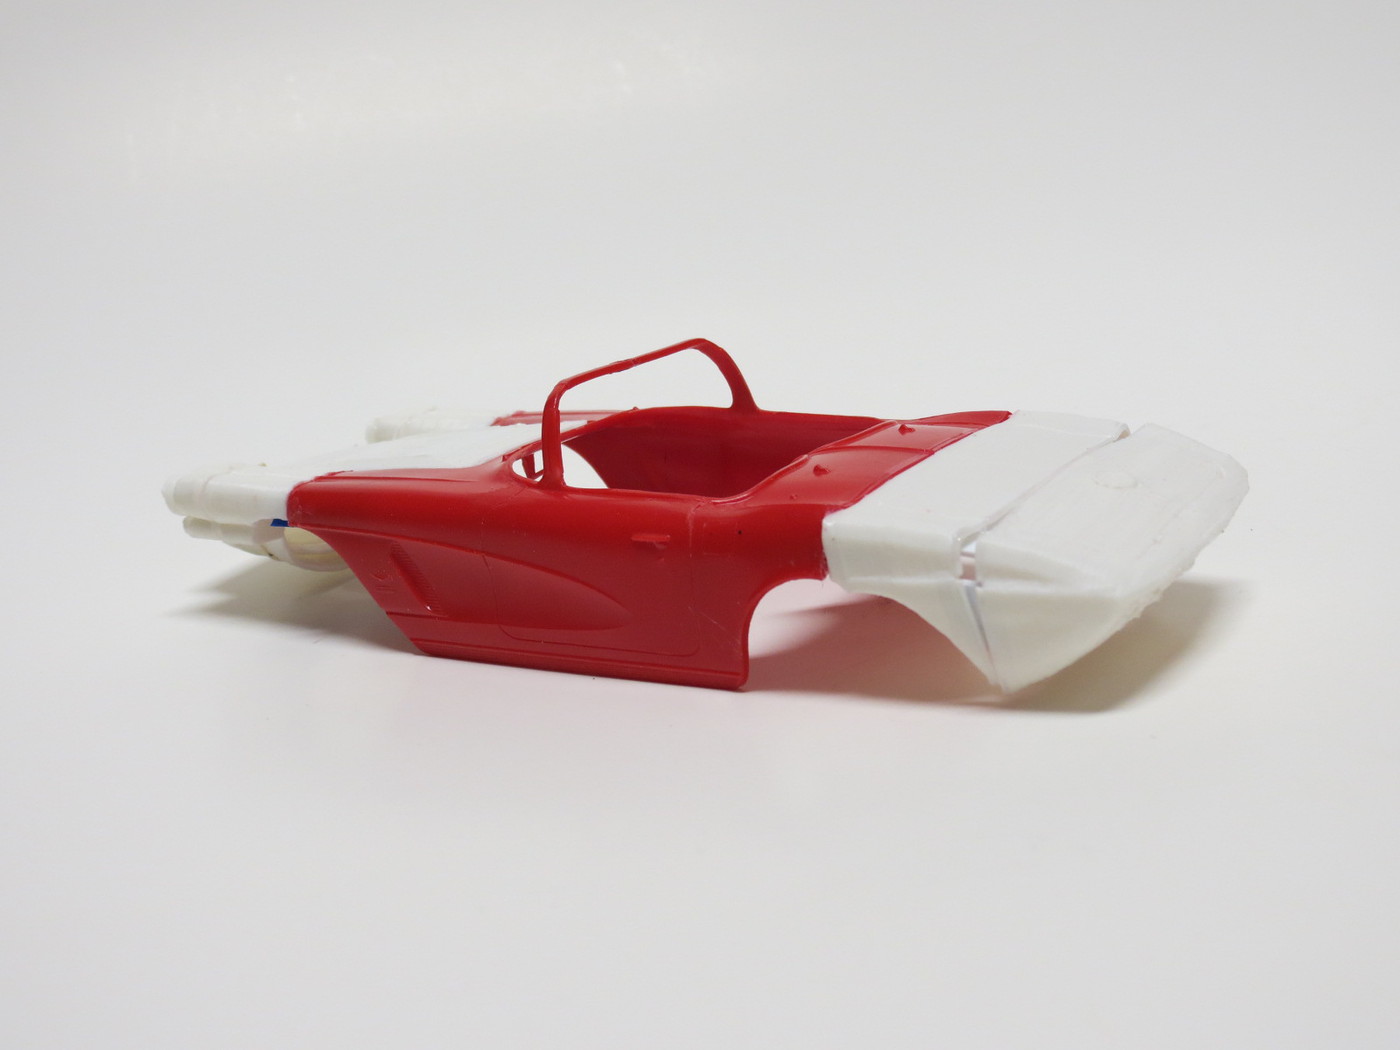 As you can see, there are some serious gaps to fill, even on parts that were literally cut apart from solid 3D model sections. I also failed to measure the rear fender top crease separation on the AMT kit, so there will be some grinding a filling to make that line smooth. If I were doing more than one, I would go back and correct the 3D computer model. As the rear section needs puttying anyway, it's faster to do that than print a new part. It took over an hour to print the rear end segments. FMW |
|
|
|
XP-616
Aug 6, 2016 11:47:25 GMT -8
Post by FMW on Aug 6, 2016 11:47:25 GMT -8
Here are pictures of 1st Putty and 1st Primer. 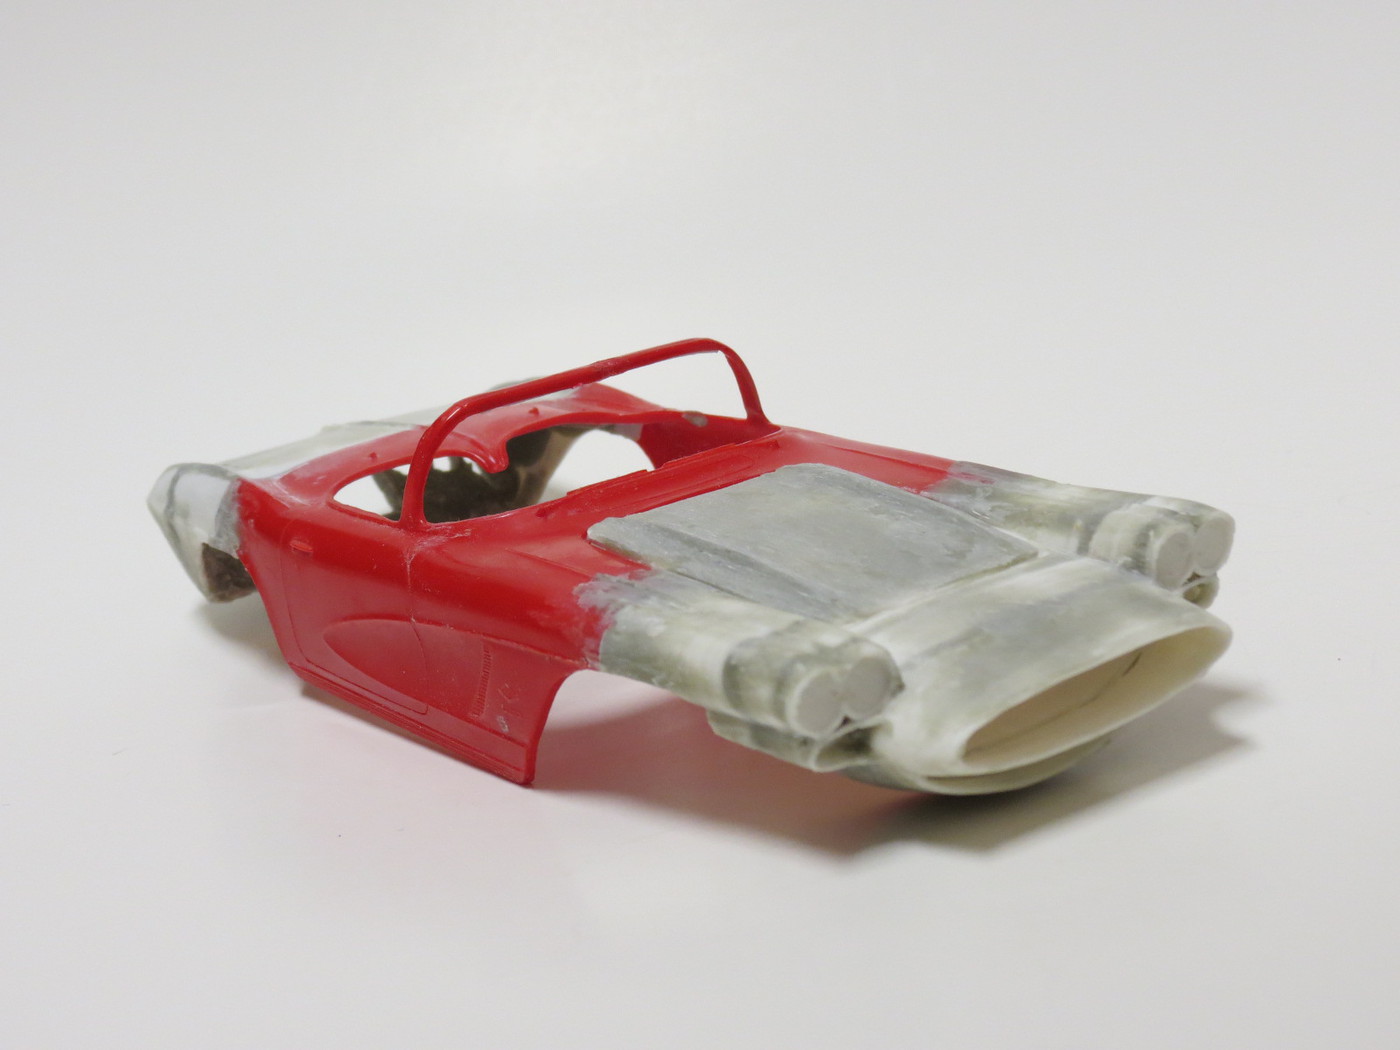 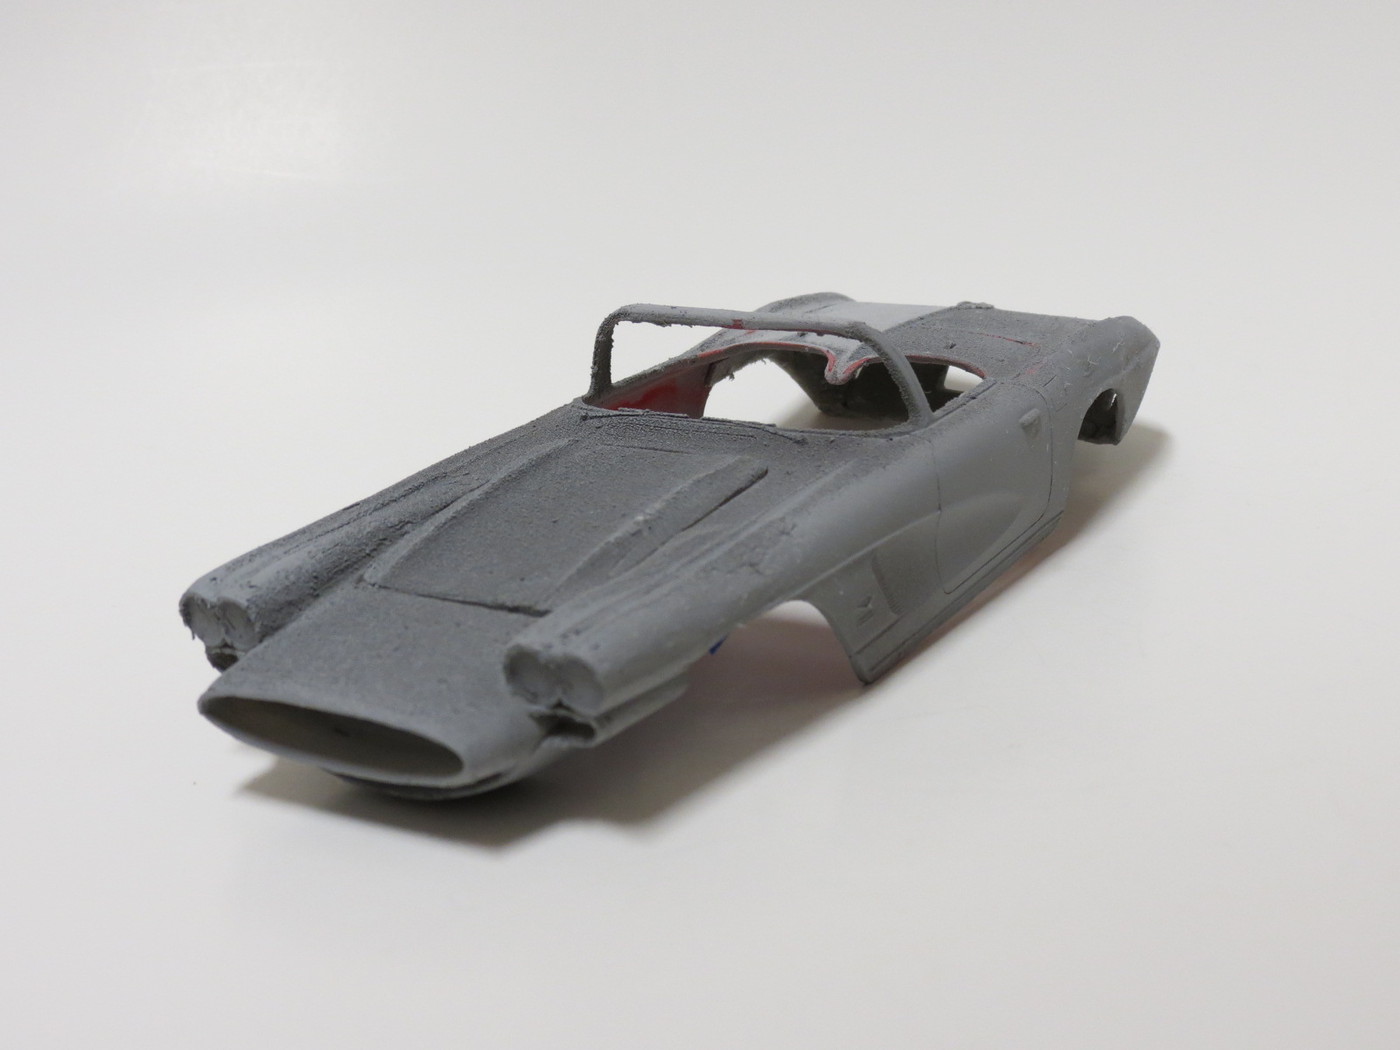 Still a long way to go, but I think it's starting to look promising. FMW |
|
|
|
XP-616
Nov 20, 2016 10:35:53 GMT -8
Post by FMW on Nov 20, 2016 10:35:53 GMT -8
And here it is finished. Like all my stuff, it's not exactly contest material, but it does demonstrate the viability of 3D printed modifications. Everything forward of the midline of the front wheel opening and rearward of the midpoint of the back wheel opening, as well as the hood, are printed parts. 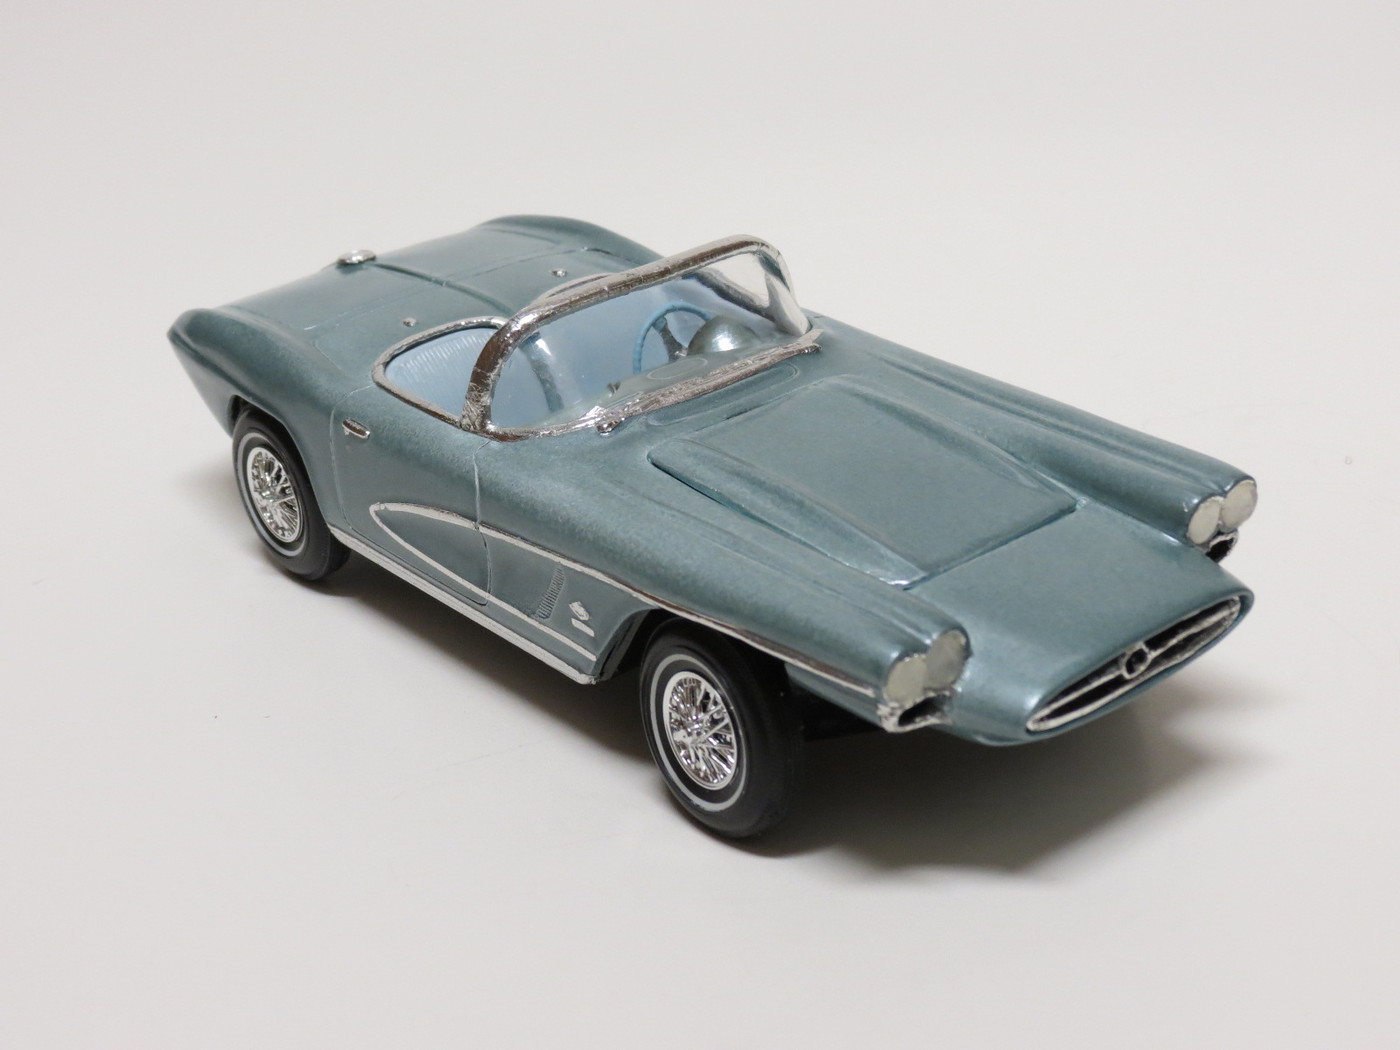  FMW |
|
