Post by Danno on Aug 31, 2010 21:46:06 GMT -8
Continuing the buildup of the Cosma Ray, it’s time to turn to the chassis. But before the painting and gluing begins, it’s time to talk a little about the Cosma Ray kit. The original kit has some flaws and obvious peculiarities.
MPC issued the Cosma Ray kit (# 505-200) in 1968. Although it represented one of the most successful show cars of its time, there was no background information printed on its box or instruction sheet, and absolutely no mention of its creator, Darryl Starbird. The best explanation for that seems to be that Starbird was under contract to Monogram, but for reasons unknown Monogram did not kit the Cosma Ray. And, for whatever reason, MPC’s Cosma Ray kit was never re-issued.
The kit was based on re-tooling of their 1967 Corvette annual. Since the 1968 Corvette was a completely different car, MPC apparently saw no future for their 1967 annual tool and it was sacrificed to kit the Cosma Ray. In the process of modifying the 1967 annual into the Cosma Ray kit, MPC did some funny things. For example, the Cosma Ray featured side exhausts mounted on the rocker panels. However, the kit’s chassis still had the molded-in dual exhaust pipes and mufflers/resonators of the stock Corvette. Worse, there was no piping to connect the exhaust manifolds to the side pipes! The back half of the chassis was molded open, exposing the unfinished underside of the interior bucket above the rear suspension and differential.
And, the kit contained two sets of wheels; one set of the 1967 Corvette’s factory turbine wheels and a set of American Racing’s Wire Mags. The box art illustration shows the Cosma Ray wearing the wire mags, but I’ve never seen the Cosma Ray wearing the factory turbine wheels.
Greg Wann’s Cosma Ray resin kit faithfully reproduced the MPC kit as it was produced, including the inaccurate chassis plate and the exhaust system anomalies. However, there were two departures from the MPC kit’s layout: Greg’s kit does not include tires or the metal coil springs required for the front suspension.
As such, I built two variations of chassis for this project. First, I built the original chassis as provided in Greg’s kit, based on the 1968 MPC design.
Then, I opted to build and detail a more detailed chassis from the Revell 1967 Corvette (kit# 85-2333). Since my model is to be a replica of the Cosma Ray as she now appears at Starbird’s museum, I selected the wheels and tires from Revell’s 1969 Baldwin Motion Corvette (kit# 85-2383). These wheels and tires perfectly reproduce the Cosma Ray’s current shoes.
Greg’s resin kit is great! Although previously I spoke of soaking the body overnight in Bleche-White, Greg contacted me and advised me that was an unnecessary step with his products. He stated he uses a more expensive mold release that is cleaner, leaves no residual and is paintable, so that no soaking treatment is required. I decided to verify that with the chassis components (and with the interior, as we will see later). I found no issues or problems and all the paints I applied -- acrylic, enamel, hobby lacquer and automotive lacquer -- went on smoothly, covered properly, and displayed no problems or anomalies.
Having said that, let’s get going. First up was an inspection of the kit’s chassis parts. The frame and underside of the interior were sprayed with Equipment Gray Primer (WalMart Color Place # 20010), to represent the car’s fiberglass floor panels, and Semi-Gloss Black (Tamiya TS-29) was applied to the frame rails and other chassis portions.
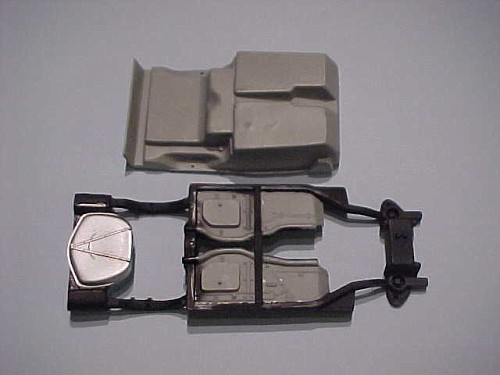
Rear suspension and differential components were treated to Magnesium (Model Master # 1453) and Titanium (Model Master # 1454), then Semi-Gloss Black was applied to the frame crossmember molded integrally with the upper differential half. Note the crispness of the resin parts.
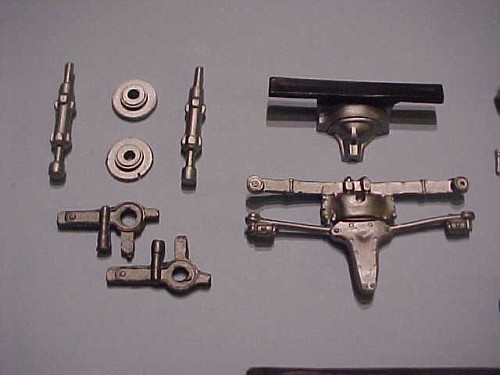
After assembly, the rear chassis makes a decent representation of the Corvette underside, with the exception of the exhaust pipes and mufflers previously mentioned. This view shows it prior to final touch-up of overspray and knicked paint areas.
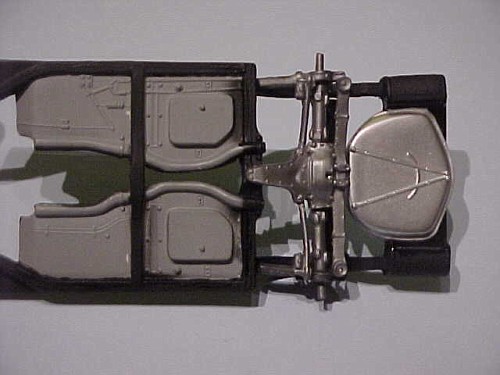
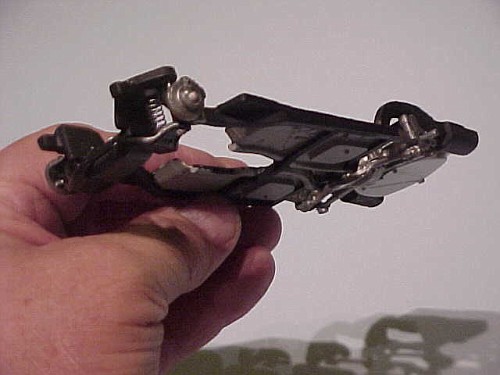
Front suspension components were detailed with the same basic colors. There were a couple of air bubble voids in the front rotors/hubs but they were in locations that did not affect assembly and would not be visible once wheels/tires were installed, so I made no repairs. The MPC kit offered working suspension and poseable steering; Greg’s clean castings and quality resin materials made it possible to construct the chassis with those features intact.
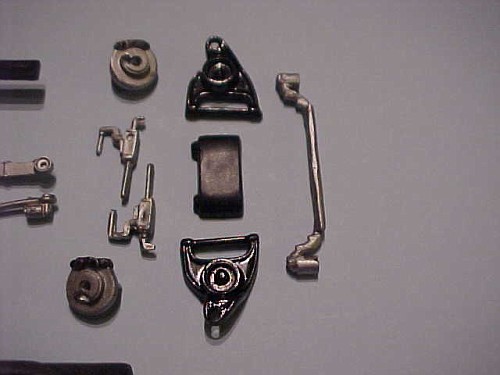
I cut down a ball-point pen spring to two pieces, each 7mm long.
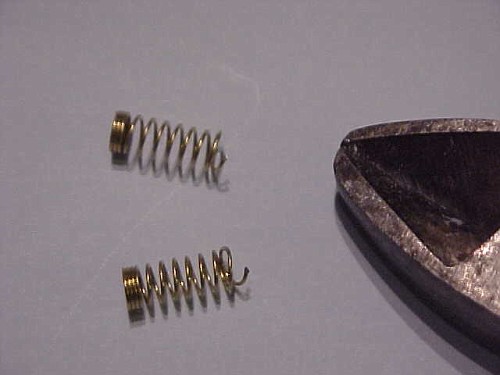
Next, I shot them with Magnesium (Model Master # 1453).
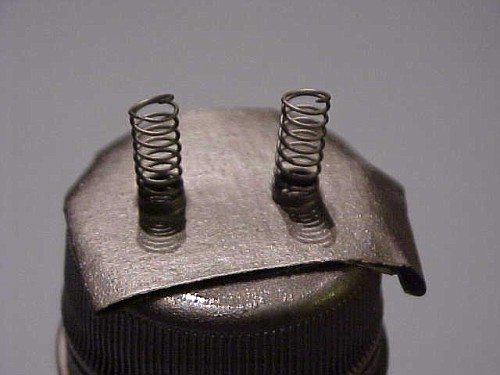
The spring halves were then epoxied into the frame pockets. After they cured, the spindles, lower A-arms, hubs/rotors, and the lower A-arm cover were installed. The steering and suspension function as designed. Just a caution, though: use care in assembling the fragile parts. The spindles have key-shaped ends that fit snugly into key-shaped holes in the A-arms, then rotate 90-degrees to hold the spindles in position. This was a fiddly procedure with the old styrene MPC parts, and resin is a little more brittle than styrene. It would be easy to break the delicate parts if using a heavy touch to assemble. Easy does it.
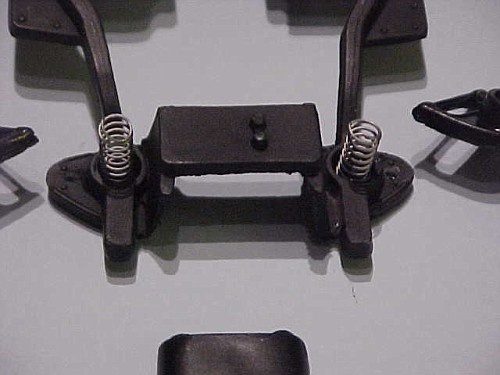
A little touch-up here and there, and its ready for an engine and some wheels/tires. The end result is a nice looking front end that will thrill and amaze your friends.
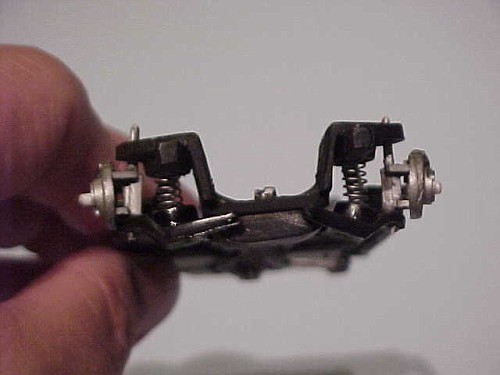
Greg’s resin chassis looks every bit as good as the MPC kit ever did. Tip: If you have one of those old MPC Corvette annual kits that came with the working suspension, Greg's chassis would be a valuable replacement for a broken or incomplete chassis!
Finally for this installment of our review of the resin kit, as mentioned previously, it has some great wheels. Take a look at how cleanly the American Mag style Wire Mags were reproduced! At left is the bare resin wheel; center is a wheel coated with Magnesium (Model Master # 1453); right is a wheel coated with Ace Metallic Mirrored Silver (# 1236595). The picture just doesn’t do the chromed wheel justice! (A reflection makes the hub look malformed, although it is just as clean as the magnesium wheel.)

We ran out of space for this “episode” so I’ll push the interior and my Revell chassis to the next installment. Hope you're enjoying!
MPC issued the Cosma Ray kit (# 505-200) in 1968. Although it represented one of the most successful show cars of its time, there was no background information printed on its box or instruction sheet, and absolutely no mention of its creator, Darryl Starbird. The best explanation for that seems to be that Starbird was under contract to Monogram, but for reasons unknown Monogram did not kit the Cosma Ray. And, for whatever reason, MPC’s Cosma Ray kit was never re-issued.
The kit was based on re-tooling of their 1967 Corvette annual. Since the 1968 Corvette was a completely different car, MPC apparently saw no future for their 1967 annual tool and it was sacrificed to kit the Cosma Ray. In the process of modifying the 1967 annual into the Cosma Ray kit, MPC did some funny things. For example, the Cosma Ray featured side exhausts mounted on the rocker panels. However, the kit’s chassis still had the molded-in dual exhaust pipes and mufflers/resonators of the stock Corvette. Worse, there was no piping to connect the exhaust manifolds to the side pipes! The back half of the chassis was molded open, exposing the unfinished underside of the interior bucket above the rear suspension and differential.
And, the kit contained two sets of wheels; one set of the 1967 Corvette’s factory turbine wheels and a set of American Racing’s Wire Mags. The box art illustration shows the Cosma Ray wearing the wire mags, but I’ve never seen the Cosma Ray wearing the factory turbine wheels.
Greg Wann’s Cosma Ray resin kit faithfully reproduced the MPC kit as it was produced, including the inaccurate chassis plate and the exhaust system anomalies. However, there were two departures from the MPC kit’s layout: Greg’s kit does not include tires or the metal coil springs required for the front suspension.
As such, I built two variations of chassis for this project. First, I built the original chassis as provided in Greg’s kit, based on the 1968 MPC design.
Then, I opted to build and detail a more detailed chassis from the Revell 1967 Corvette (kit# 85-2333). Since my model is to be a replica of the Cosma Ray as she now appears at Starbird’s museum, I selected the wheels and tires from Revell’s 1969 Baldwin Motion Corvette (kit# 85-2383). These wheels and tires perfectly reproduce the Cosma Ray’s current shoes.
Greg’s resin kit is great! Although previously I spoke of soaking the body overnight in Bleche-White, Greg contacted me and advised me that was an unnecessary step with his products. He stated he uses a more expensive mold release that is cleaner, leaves no residual and is paintable, so that no soaking treatment is required. I decided to verify that with the chassis components (and with the interior, as we will see later). I found no issues or problems and all the paints I applied -- acrylic, enamel, hobby lacquer and automotive lacquer -- went on smoothly, covered properly, and displayed no problems or anomalies.
Having said that, let’s get going. First up was an inspection of the kit’s chassis parts. The frame and underside of the interior were sprayed with Equipment Gray Primer (WalMart Color Place # 20010), to represent the car’s fiberglass floor panels, and Semi-Gloss Black (Tamiya TS-29) was applied to the frame rails and other chassis portions.

Rear suspension and differential components were treated to Magnesium (Model Master # 1453) and Titanium (Model Master # 1454), then Semi-Gloss Black was applied to the frame crossmember molded integrally with the upper differential half. Note the crispness of the resin parts.

After assembly, the rear chassis makes a decent representation of the Corvette underside, with the exception of the exhaust pipes and mufflers previously mentioned. This view shows it prior to final touch-up of overspray and knicked paint areas.

Front suspension components were detailed with the same basic colors. There were a couple of air bubble voids in the front rotors/hubs but they were in locations that did not affect assembly and would not be visible once wheels/tires were installed, so I made no repairs. The MPC kit offered working suspension and poseable steering; Greg’s clean castings and quality resin materials made it possible to construct the chassis with those features intact.

I cut down a ball-point pen spring to two pieces, each 7mm long.

Next, I shot them with Magnesium (Model Master # 1453).

The spring halves were then epoxied into the frame pockets. After they cured, the spindles, lower A-arms, hubs/rotors, and the lower A-arm cover were installed. The steering and suspension function as designed. Just a caution, though: use care in assembling the fragile parts. The spindles have key-shaped ends that fit snugly into key-shaped holes in the A-arms, then rotate 90-degrees to hold the spindles in position. This was a fiddly procedure with the old styrene MPC parts, and resin is a little more brittle than styrene. It would be easy to break the delicate parts if using a heavy touch to assemble. Easy does it.

A little touch-up here and there, and its ready for an engine and some wheels/tires. The end result is a nice looking front end that will thrill and amaze your friends.

Greg’s resin chassis looks every bit as good as the MPC kit ever did. Tip: If you have one of those old MPC Corvette annual kits that came with the working suspension, Greg's chassis would be a valuable replacement for a broken or incomplete chassis!

Finally for this installment of our review of the resin kit, as mentioned previously, it has some great wheels. Take a look at how cleanly the American Mag style Wire Mags were reproduced! At left is the bare resin wheel; center is a wheel coated with Magnesium (Model Master # 1453); right is a wheel coated with Ace Metallic Mirrored Silver (# 1236595). The picture just doesn’t do the chromed wheel justice! (A reflection makes the hub look malformed, although it is just as clean as the magnesium wheel.)

We ran out of space for this “episode” so I’ll push the interior and my Revell chassis to the next installment. Hope you're enjoying!
